| CS2020: Web Science, Sytems and Design | ||||||
|
Adobe Macromedia Flash 8 Tutorial:
Creating an Animated Banner Page 6
Configure the Text Layer
Before beginning to work on the Text layer, click the lock icon on the Shape layer to prevent accidentally changing it.
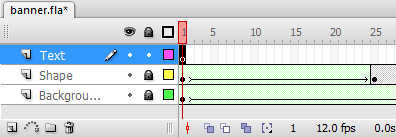
Now you are ready to get started with the Text layer. You need to tell Flash what layer you are working on. Click in Frame 1 in the Timeline on the same row as the Text layer to select this layer and frame. See the Figure below.
The
Text layer contains the name of the company "Acme Web Design" and move
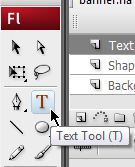
in from the right. Select the Text Tool from the Tools panel as shown
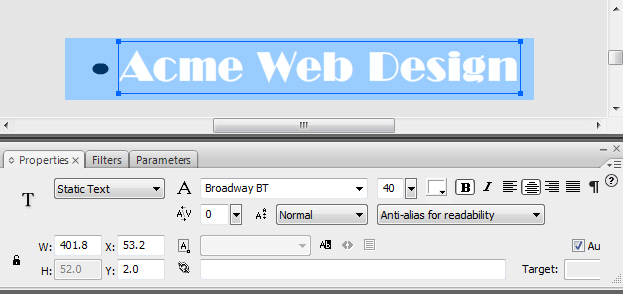
at the right. Your cursor will change to Use the Property panel to configure the font, size, and color of your text. In the example, the font is set to Broadway BT. Use this font face or another font of your choice. The font size is set to 40. The color is set to #FFFFFF. With the Text Tool selected, type "Acme Web Design". |
 |
Your
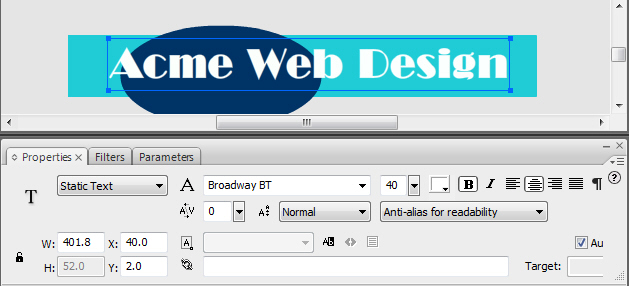
Stage and Properties panel should look similar to the one below. (If
your Properties panel does not automatically display, select Window
> Properties > Properties.) |
|
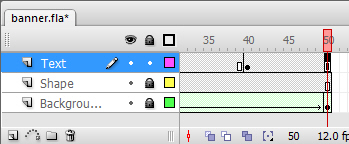
Next, you will add a keyframe on the Text Layer in the Timeline Frame area. If necessary, scroll the Timeline Frame area to the right so the frame labeled 40 is in view. Click in Frame 40 on the Text Layer and press the F6 key. This places a keyframe in Frame 40. A keyframe tells Flash that a change occurs in this frame.
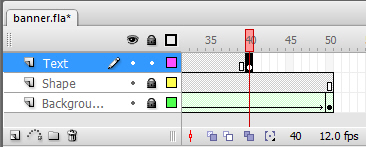
Your Timeline should be similar to the one shown above. If you accidentally click on a different layer or frame --remember you can back out your changes using CTRL-Z or Edit > Undo.
With this frame still selected, you will move the location of the text. Either drag the text object over to the left with your mouse, or use the Select Tool to click on the text object and modify the Properties panel -- change the X value to 40.0. Your Stage should be similar to the figure below.
The other layers have 50 frames and the Text layer has only 40 frames. Scroll the Frames Timeline so that Frame 50 is visible. Click in Frame 50 of the Text Layer and press the F5 key to add frames to the timeline. See the figure below.
Add Animation to the Text Layer
Next, you will use Flash to automatically move the text from the right side of the stage (Frame 1) to the location on the Stage in Frame 40. You will configure a Motion Tween. Click on a Frame between Frame 1 and Frame 40 in the Text layer. The Properties panel will display a Tween select menu. Select Motion as shown in the figure below.

The Timeline will now show an arrow between Frame 1 and Frame 40. Your Timeline should look like the figure below. If you see a dotted line instead, undo your work or reload the saved version of banner.fla to try again. View the Timeline and examine the background color of the frames. The Shape Tweens are indicated by a green background color and the Motion Tween is indicated by a blue background color.

Test the Background, Shape, and Text Animation
You
can "play" the animation with the Timeline. Scroll the Timeline to the
left until Frame 1 is visible. Click on the red rectangle (called the
"playhead") and drag it to the right to see the both the Shape and
Background animations play! Another method for this playback is to
select Control > Play from the menu.
You can
also test the animation outside of the Timeline and Stage. Select
Control > Test Movie. A new window will open with your Flash movie
as shown below.

Notice that now the text moves in from right to left. You are done designing your Flash animation. The next step is to publish the movie (create a .swf) and test the movie in a web page.
Save your file.
Continue to publish and test your animated banner..
