| CS2020: Web Science, Sytems and Design | ||||||
|
Adobe Flash CS3 Tutorial:
Creating an Animated Banner Page 5
Configure the Shape Layer
Before beginning to work on the Shape layer, click the lock icon on the Background layer to prevent accidentally changing it.
Now you are ready to get started with the Shape layer. You need to tell Flash what layer you are working on. Click in Frame 1 in the Timeline on the same row as the Shape layer to select this layer and frame. See the Figure below.
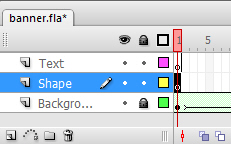
The Shape layer contains an oval shape that changes size and color. Use the Tools panel to choose the color for the pencil (outline) and bucket (fill) of the oval shape you wil create. Click on the color chooser next to each and select #003366. |
|
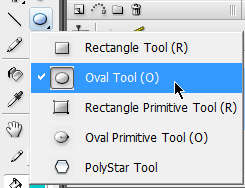
Next, click on the Oval Tool (shown in the figure at the right) to draw an oval shape on the Stage. Your cursor will change to "+". Start at the upper left corner and drag a small oval on the left side of the stage. Don't worry if it is not perfect, you can use the Properties panel to exactly set the dimensions. |
 |
Your
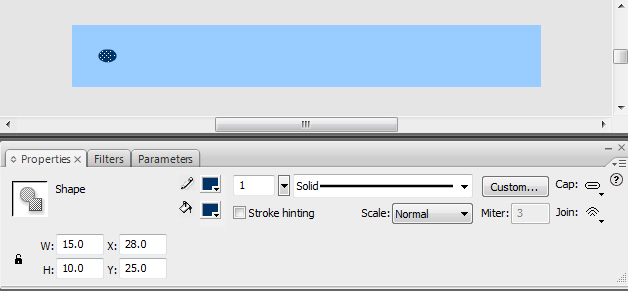
Stage and Properties panel should look similar to the one below. (If
your Properties panel does not automatically display, select Window
> Properties > Properties.) |
|
If your "W", "H", "X", and "Y" values are different, type the following values in the corresponding text boxes: W: 15.0 X: 28.0 |
This configures the oval to be placed 25 pixels from the top (Y value) and 28 pixels from the left (Y value) place on the Stage. It also configures the oval to be 15 pixels wide (W value) and 10 pixels high (H value). |
Next, you will add a keyframe on the Shape Layer in the Timeline Frame area. If necessary, scroll the Timeline Frame area to the right so the frame labelled 25 is in view. Click in Frame 25 on the Shape Layer and press the F6 key. This places a keyframe in Frame 25. A keyframe tells Flash that a change occurs in this frame.

Your Timeline should be similar to the one shown above. If you accidentally click on a different layer or frame --remember you can back out your changes using CTRL-Z or Edit > Undo.
With this frame still selected, you will change the color and shape of the Oval. You will use the Selection Tool in the Tools panel (see figure below).
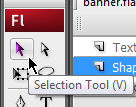
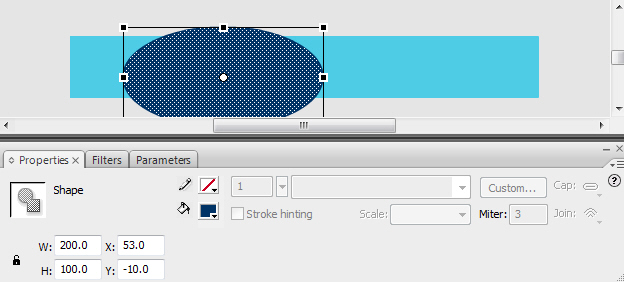
Click on the Selection Tool. Click on the oval to display the Properties panel. Change the height to 100.0. the width to 200.0 and the Y value to -10.0. Change both the outline and fill color to #006666. rectangle. Use the Color Chooser to choose the color #00CCCC for both the pencil (outline) and bucket (fill) colors. Click on the Stage to view the effect of the new values. The Properties and Stage panels are shown below.
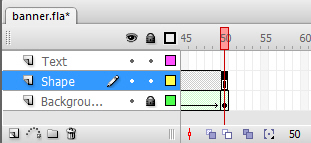
The Background Layer has 50 frames and the Shape Layer has 25 frames. Srcoll the Frames Timeline so that Frame 50 is visible. Click in Frame 50 of the Shape Layer and press the F5 key to add frames to the timeline. See the figure below.
Add Animation to the Shape Layer
Next, you will use Flash to automatically change the color and shape of the oval in the Shape layer using a Shape Tween. Click on a Frame between Frame 1 and Frame 25 in the Shape layer. The Properties panel will display a Tween select menu. Select Shape as shown in the figure below.

The Timeline will now show an arrow between Frame 1 and Frame 25. Your Timeline should look like the figure below. If you see a dotted line instead, undo your work or reload the saved version of banner.fla to try again.

Test the Background and Shape Animation
You
can "play" the animation with the Timeline. Scroll the Timeline to the
left until Frame 1 is visible. Click on the red rectangle (called the
"playhead") and drag it to the right to see the both the Shape and
Background animations play! Another method for this playback is to
select Control > Play from the menu.
You can
also test the animation outside of the Timeline and Stage. Select
Control > Test Movie. A new window will open with your Flash movie
as shown below.

Notice that the top and bottom of the oval do not appear in the Flash .swf movie -- that is because these portions of the oval are beyond the Stage. This is a common technique.
Save your file.
Continue to animate the Text layer of your animated banner.
