|
||||||
|

Incorporating Non-Free OpenCV modules like SIFT and SURF in Android OpenCV project
***** from M. Nguyen********
INSTRUCTIONS TO INCORPORATE NON FREE SIFT AND SURF FOR ACADEMIC USE IN OPENCV ANDROID PROJECT
I follow the steps below mentioned in the book “Mastering opencv android application” and was able to use SIFT and SUFT methods:
- STEP 1: Download Android ndk and extract it to a directory in your computer:
Link download: https://developer.android.com/ndk/downloads/index.html
- STEP 2: Download nonfree_init.cpp, precomp.cpp, sift.cpp, and surf.cpp files github
Link download: https://github.com/opencv/opencv/releases/tag/2.4.13.2
Get sourcecode.zip file, extract it and these files should be under …\ modules\nonfree\src folder.
STEP 2.1 In Android studio INSIDE OF YOUR APPLICATION, create a directory called jni and copy all these to that directory
STEP 2.2 Open precomp.hpp and remove the lines #include "cvconfig.h" and #include "opencv2/ocl/private/util.hpp".
STEP 2.3 Open nonfree_init.cpp and remove the lines of code starting from #ifdef HAVE_OPENCV_OCL and ending at #endif.
- STEP 3: Under the jni folder (in your android studio app) , create a file called Android.mk and paste these lines into it:
LOCAL_PATH := $(call my-dir)
include $(CLEAR_VARS)
OPENCV_CAMERA_MODULES:=on
OPENCV_INSTALL_MODULES:=on
include C:/OpenCV-android-sdk-2.4.13/sdk/native/jni/OpenCV.mk<-Note: Remember to change this line to your corresponding directory
LOCAL_MODULE := nonfree
LOCAL_SRC_FILES := nonfree_init.cpp \
sift.cpp \
surf.cpp
LOCAL_LDLIBS += -llog -ldl
include $(BUILD_SHARED_LIBRARY)
- STEP 4: Under jni folder (in your android studio app), create another file called Application.mk and paste these lines into it
APP_STL := gnustl_static
  APP_CPPFLAGS := -frtti -fexceptions
  APP_ABI := armeabi-v7a mips x86 <- Note: I had problem running armeabi abi, if you don’t have that problem, simply add armeabi to this line. They are separated by a space.
  APP_PLATFORM := android-22
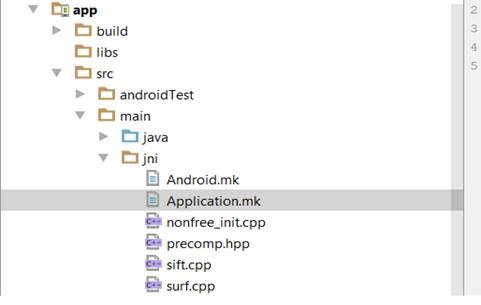
Here is a screen shot of this folder:
- STEP 5: Open the build.gradle fle in your app folder. Under the android section,
add the following:
sourceSets.main {
jniLibs.srcDir 'src/main/libs'
jni.srcDirs = [] //disable automatic ndk-build call
}
- STEP 6: Open terminal or command prompt, point to your project jni folder of your project directory
cd <project_directory>/app/src/main/jni
Example- mine is:
C:\Users\minhn\OneDrive\Academy\CSU_EastBay\Courses\Computervision_6825\UsingSIFT4\app\src\main\jni
run: <ndk_dir>/ndk-build
<ndk_dir> is where you extracted your Android ndk files.
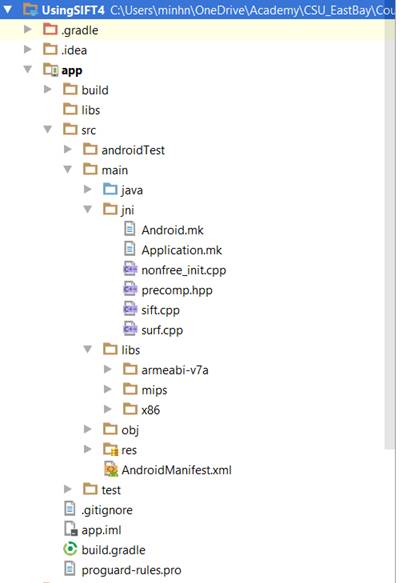
After building successfully, your project would look like this:
- STEP 7: Now last step, in your Android app where you make a call to load the
, add this line System.loadLibrary("nonfree")
under case LoaderCallbackInterface.SUCCESS your code might look like this
@Override
  public void onManagerConnected(int status) {
      switch (status) {
          case LoaderCallbackInterface.SUCCESS:

                System.loadLibrary("nonfree");
              break;
          default:
              super.onManagerConnected(status);
              break;
      }
  }
********DONE*******Now we can use those nonfree algorithms of sift and surf we just added in OpenCv. There is also a video on YouTube showing how to handle this task. In this video, instead of building the .so files, he copies those .so from internet and pastes directly to the project. I have not tested it but it seems working and a bit faster:
Here is the link: https://www.youtube.com/watch?v=cLK9CjQ-pNI