|
CS6320: SW Engineering of Web Based Systems |
||||||
|
Photo Site Exercise using Rails
In this project you will use Rails to create the beginnings of a photo-sharing Web site. For this project, the Web site will display pre-entered information in the database. In future projects you will add additional features, such as the ability to add new photos and to tag photos with the names of users.
Setup
Create a Rails application for this project by invoking the following command:
RubyMine IDE: File->New Project -> Ruby Project, name it PhotoSite
This will create a directory project4 that contains a skeleton for the project. Your solutions for the problems below should be implemented in this project. Follow the instructions described under Additional Setup for Project #3 to modify the default Rails configuration.
Item 1: Use Migrations to Create the Database
- STEP 1 CREATE User MODEL:
Photos in the photo-sharing site are organized by user. Start off by creating the model class User and its associated database table, with the following attributes:
IN RubyMine IDE:id Primary key for this user. automatically created first_name First name of the user. string. last_name Last name of the user. string This will create a migration file with a name something like 20120330202846_create_users.rb in the directory db/migrate. It will also create an initial model file app/models/user.rb.RubyMine: Tools-> Run Rails Generator -> model >>> give it the name User Command Line: rails generate model user
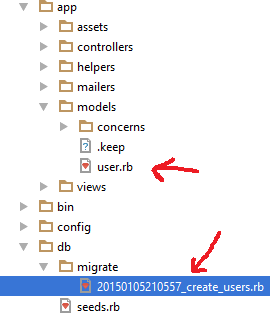
Edit the migration file and fill in the body of the change method as described in class materials
- STEP 2 CREATE Photo MODEL:
Each user can upload multiple photos. Use the same approach as above to create the model Photo and its associated database table, with the following attributes:id Primary key for this photo. user_id Identifier for the user who created the photo. date_time The date and time when the photo was added to the database. (type :date) file_name Name of a file containing the actual photo (in the directory project4/app/assets/images).
- STEP 3 CREATE Comment MODEL:
For each photo there can be multiple comments (any user can comment on any photo). Use the same approach as above to create the model Comment and its associated database table, with the following attributes:id Primary key for this comment. photo_id Identifier for the photo to which this comment belongs. user_id Identifier for the user who created the comment. date_time The date and time when the comment was created. comment_text The text of the comment.
- STEP 3 MODIFY MODEL CLASSES TO SHOW RELATIONSHIPS:
Modify the model classes created above to include the relationships between models (e.g. each photo is associated with a user, and each comment is associated with both a photo and the user who created the comment).
HINT:see our Model lecture where we discusshasmany: XXX AND belongs_to: XXX
class User < ActiveRecord::Base

  has_many :photos
  has_many :comments

end - STEP 4 CREATE A DATA MIGRATION FILE TO PRE_LOAD DATA
Create an additional data migration that will pre-load the database with some initial data. To do this, invoke the following command:COMMAND LINE: rails generate migration load_data RubyMine IDE: Tools-> Run Rails Generator -> migration (then give the name load_data)
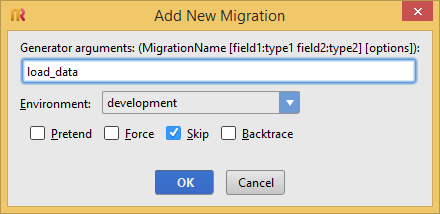
Then find the new migration file and replace its contents with the contents of this file: load_data.rb. In addition, copy all of the images fromthis zip file into the directory app/assets/images.
- STEP 5: RUN ALL THE MIGRATIONS YOU SETUP
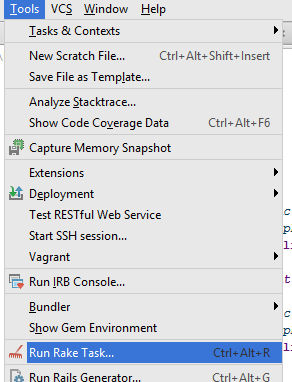
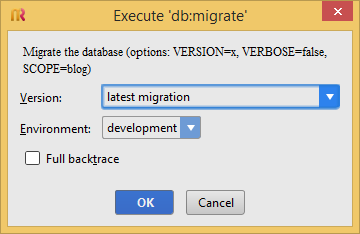
Invoke the following command, which will run all of your migrations, creating the database schema and loading the initial data:COMMAND LINE: rake db:migrate RubyMine IDE: Tools->Run Rake Task -> db:migrate
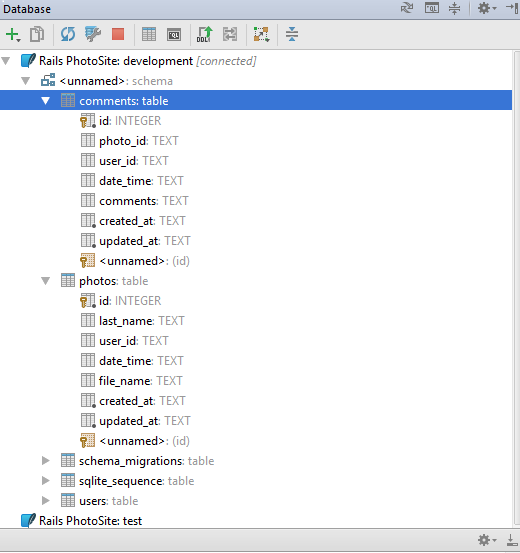
- STEP 6: RUN RUBYMINE's database tool too see you have created the tables
Item 2: Create the Application
Create controllers and views that implement two URLs.
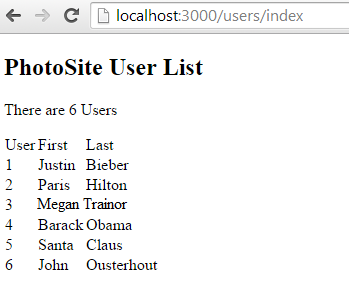
The first URL is /users/index.
When this URL is referenced your application must return a Web page that displays a list of all users in the database. The user names must be links: clicking on a user name displays the photos for that user, as described below.
- You need to create the index method in your User Controller class (HINT: see lecture on Controller). This method should use the User Model class to request getting all the users from the users database table (HINT: see lecture on Models and Databases) and store in @users_all (HINT: @users_all = User.?????? ---you fill in ?????)
- You need to setup the route in the config/routes.rb file that will map your /users/index to call the User Controller class's index method (HINT: see lecture on routes)
- You need to setup the view index.html.erb that will be called automatically by the index method in the User Controller class. This class will use the array @users_all defined in the User Controller class and cycle through each User and print out their information (first and last name).
OUTPUT (if you did above correct)
The second URL is /photos/index/id
The second URL supported by your application has the form /photos/index/id, where id is the database identifier for a particular user. When this URL is referenced your application must return a web page displaying all of the photos belonging to that user. For each photo you must display the photo itself, the creation time for the photo, and all of the comments for that photo. For each comment you must display the time when the comment was created, the name of the user who created the comment, and the text of the comment. The creator for each __comment should be a link that can be clicked to switch to the photos page for that user.
Note regarding Formatting/Style of out Output
Although you don't need to spend a lot of time on the appearance of the pages you generate, they should be neat and understandable. They should have meaningful titles, and the information layout should be clean (e.g., it should be clear which photo each comment applies to). Use the personalized layout you created for the last project.