|
CS6320: SW Engineering of Web Based Systems |
||||||
|
Google App Engine --- Java App basics
IMPORTANT: unlike normal webapps you will be using a web.xml file for Google App Engine
examples here are written as much as possible independent of servlet version and hence may lack annotations you use
in later versions of servlet api. Please insert as necessary. This web page is not to teach you about java and web apps but, creation
of them on Google App Engine. Also, partial code may be given.
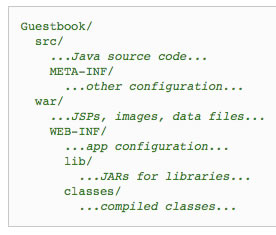
file structure -- example Guestbook webapp
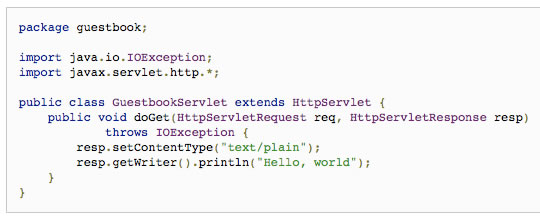
Guestbook Servlet
App Engine descriptor file (appeengine-web.xml)

JSP to use User Services for "Login" and Logout"
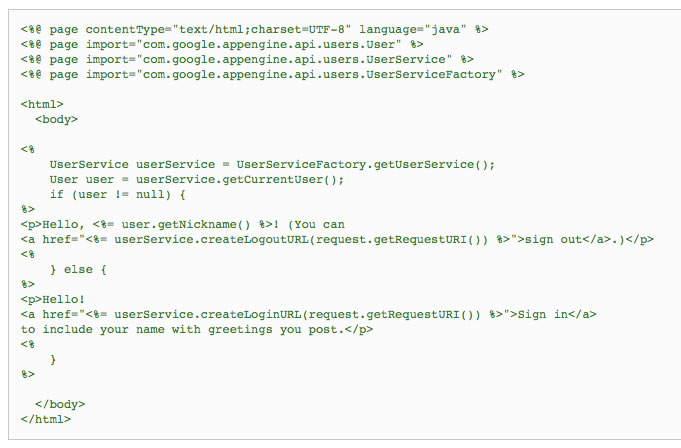
<<get UserService instance
and use this to get current user
<<get currently logged in user's nickname ...and provide ability to loggout
<<provide login
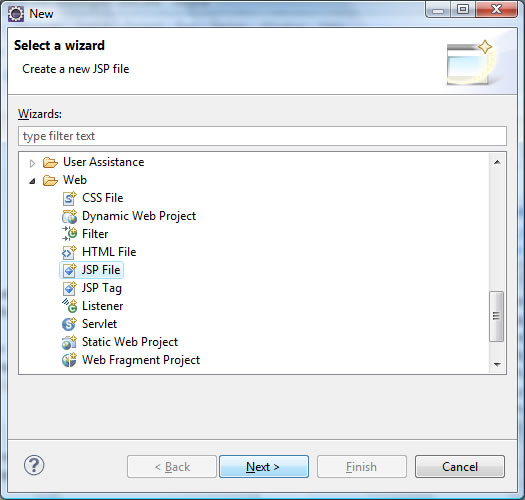
How to create JSP file (should be in war directory of Google App Engine Project)
1) In Eclipse GAE project right click on war file and say file->new and pick Web/JSP file
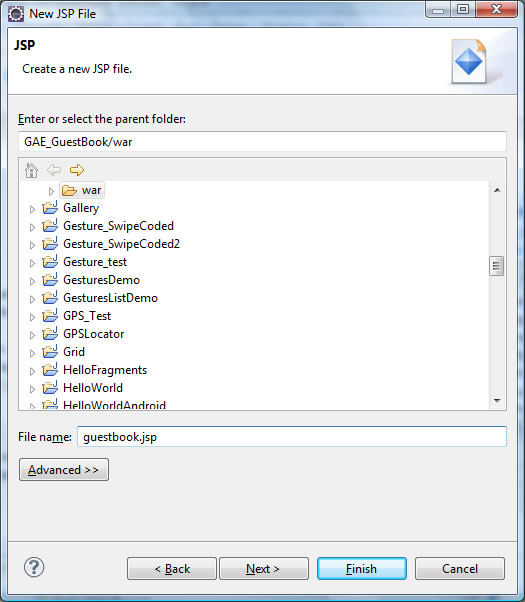
2) type in name of file "guestbook.jsp"
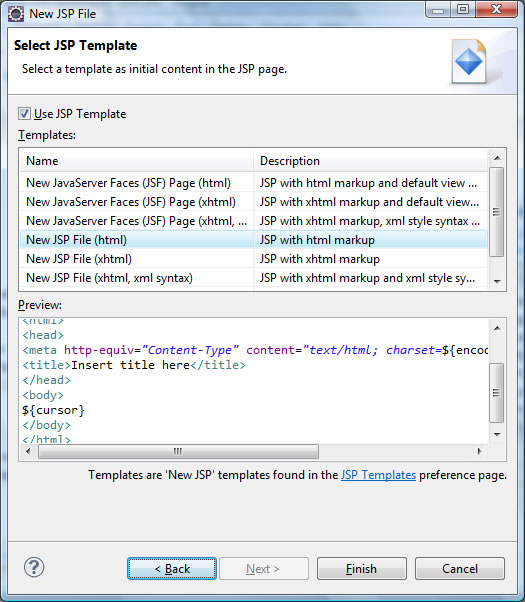
3) now select blank template you want
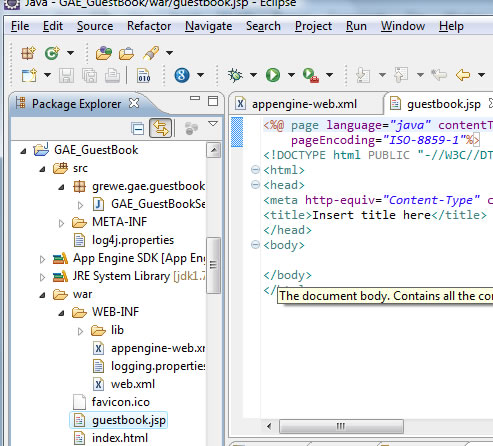
4) here is the result
The web.xml file (Web App deployment -- standard Java WebApp prior to annotations like @WebServlet)
<?xml version="1.0" encoding="utf-8"?>
<web-app xmlns:xsi="http://www.w3.org/2001/XMLSchema-instance"
         xmlns="http://java.sun.com/xml/ns/javaee"
         xmlns:web="http://java.sun.com/xml/ns/javaee/web-app_2_5.xsd"
         xsi:schemaLocation="http://java.sun.com/xml/ns/javaee
         http://java.sun.com/xml/ns/javaee/web-app_2_5.xsd" version="2.5">
<servlet>

<servlet-name>GAE_GuestBook</servlet-name>
     <servlet-class>grewe.gae.guestbook.GAE_GuestBookServlet</servlet-class>
</servlet>

<servlet-mapping>
     <servlet-name>GAE_GuestBook</servlet-name>
     <url-pattern>/gae_guestbook</url-pattern>
</servlet-mapping>

<servlet>
     <servlet-name>GAE_GuestBookJSP</servlet-name>
     <jsp-file>guestbook.jsp</jsp-file>
</servlet>

<servlet-mapping>
     <servlet-name>GAE_GuestBookJSP</servlet-name>
     <url-pattern>/gae_guestbookJSP</url-pattern>
</servlet-mapping>

<welcome-file-list>
     <welcome-file>guestbook.jsp</welcome-file>
</welcome-file-list>
</web-app>
In the above I mapped the jsp to the /gae_guestbookJSP url and also it is the welcome file
this means you can invoke it as http://localhost:8888/gae_guestbookJSP OR http://localhost:8888/guestbook.jsp
Result of the above running --note that the JPS file comes up as it is
the welcome file in the web.xml file

Result of clicking on sign in link
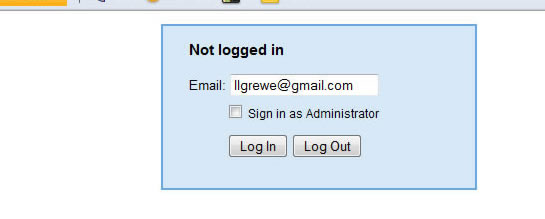
Result of signing in

Lets add a new Signing Servlet that will be invoked by a form
add to web.xml file
<servlet>
<servlet-name>sign></servlet-name>
<servlet-class>grewe.gae.guestbook.GAE_SignGuestbookServlet</servlet-class>
</servlet>
<servlet-mapping>
<servlet-name>sign</servlet-name>
<url-pattern>/sign</url-pattern>
</servlet-mapping>
new GAE_SignGeustbookServlet class
import com.google.appengine.api.users.User;
import com.google.appengine.api.users.UserService;
import com.google.appengine.api.users.UserServiceFactory;
public class GAE_SignGuestbookServlet extends HttpServlet { private static final Logger log = Logger.getLogger(GAE_SignGuestbookServlet.class.getName()); public void doPost(HttpServletRequest req, HttpServletResponse res) throws IOException{ UserService userService = UserServiceFactory.getUserService(); User user = userService.getCurrentUser(); String content = req.getParameter("content"); if(content == null) { content = "(No greeting) "; } if(user!=null) { log.info("Greeing posted by user " + user.getNickname() + " : " + content); } else { log.info("Greeting posted anonymously: " + content); } res.sendRedirect("/guestbook.jsp"); }}
make a seperate html form
<hr>
<form action="/sign" method="post">
<div> <textarea name="content" rows="3" cols="60">
</textarea></div>
<div><input type="submit" value="Post Greeting"/></div>
</form>
</body>
