Exercise 3
20 points, due April 10(start of class)
....you can work on this in small group teams BUT, you MUST turn in separately --meaning each person must have the solution deployed in their own account--- it does mean that your group will be using the same editing tool (Dreamweaver or BlueGryfon)
As a exercise, you are to use Dreamweaver or BlueGryfon and create the following set of webpages. LOOK at Project 1 --this will help you with Project 1!!!! You should use templates to design a consistent look and feel and apply it to all of the following webpages. Hence you will need to "setup a website" using Dreamweaver as demonstrated in class. You should as part of this upload all of the produced files using dreamweaver to your account. Show the resulting site to your instructor.
SPECIAL NOTE if Using BlueGriffon & "Templates":
There is NO true concept of template in BlueGriffon like there is in DreamWeaver. So what you will do is simply create a webpage template.html that contains all the content you want in EVERY webpage and you need to fix this (as you can't change it without having to change every web page that was generated from it). Then use this html file and copy it everytime you need to create a new web page in your site.
0) SETUP a called local (on your development machine) project called Project1 and setup your cs your server account and make a sub-directory under public_html called Project1. (so the url to it will be http://csweb01.csueastbay.edu/~YOURNETID/Project1 ). You will deploy all of your website (stored on your development machine in
Project1 to the server account directory Project1) to the Project1 directory in your server account.
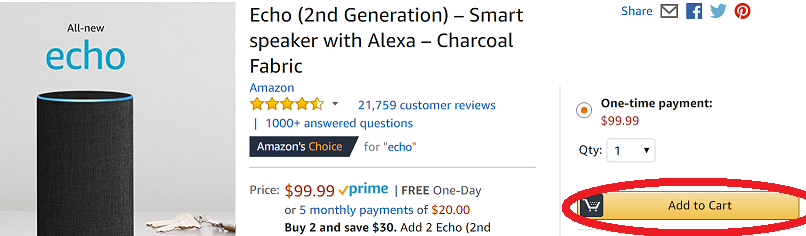
1) INDIVIDUAL PRODUCT PAGES. Individual product pages are static html pages (each called productXXX.html - for 25 products you will have 25 product html pages). THEY MUST BE DIFFERENT PAGES WITH DIFFERENT AND REAL CONTENT. The pages should look all the same in style but have different images and product description and price. Each INDIVIDUAL product page must have as part of an "Add to cart" button that will have as an action statement of its form call the static shopping cart page, cart.html
This page MUST contain a FORM that points to a local page cart.html.
<form action="cart.html" method="POST"> ******whatever form elements you want go here like quantity****** <input type="hidden" name="productid" value="1234"> ****** you put YOUR product ID here not 1234, unique ID Of product***** <input type="hidden" name="name" value="Echo"> ****** you put YOUR product name here, not Echo***** <input type="submit" value="Add to bag"> ******or can say add to cart****** </form> |
Note a user can return to a product page to make an additional order. If the user orders a product that is already in the cart you MUST not make it a separate item but, simply increase the quantity. ALSO note - we are not going to the sake of this project require you to sell items with different options (like colors or sizes) ALSO note - for the sake of our educational project you can borrow images from real products (like I have) but, ofcourse you can't really deploy this. |
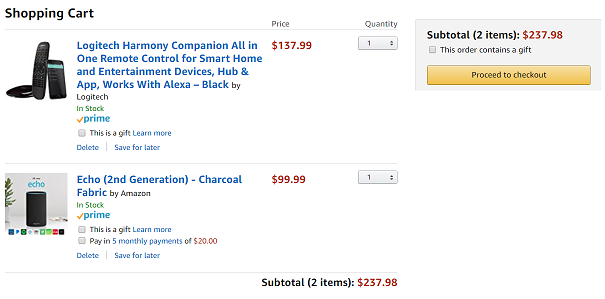
2) SHOPPING CART INTERFACE (cart.html)- It is a static shopping cart that always shows the same products (see image below). IT has a check out button and shows all the details of products currently in it. See below example.
3) UPLOAD all of the web pages (you MUST keep filenames designated above) created to your server account and test.
4) Turn IN following to Blackboard->Exercises->Exercise 3 BEFORE START OF CLASS:
URL to your Shopping cart pagewebpage. (if you followed directions the URL will be http://csweb01.csueastbay.edu/~YOURNETID/Project1/product1.html where YOURNETID is your net id)
I should be able to go to ALL of your your project pages by changing url to end in product1.html, product2.html etc.Every person in the group should turn in the URL BUT -- YOU MUST list the people in your group in your submission in addition to the URL.