| CS2020: Web Science, Sytems and Design | ||||||
|
Adobe Flash CS3 Tutorial:
Creating an Animated Banner Page 3
Flash Tool Panel
 |
Notice the Tools Panel in your Flash application. The currently selected tool is the "Selection Tool" -- the standard cursor pointer. Place your mouse over the other tool icons for a brief description of each. You will be using the "Text Tool" icon on the Tools Panel during this tutorial. Take a moment and find it. (Hint: Look for the letter T" in the Vector area on the Tools Panel.)
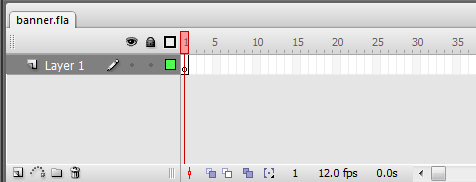
Flash TimelineTake a look at the Timeline which is located above the Stage and under the Menu bar. As you can see, there are many features on the Timeline. A few of the most commonly used features are discussed below. The left side of the Timeline (see Layer 1) is where you place your layers. Typically each layer holds one object in a Flash movie. You will be creating several layers to create the animated banner. It is good practice to assign each layer a meaningful name. The The "eye" icon can be used to make layers visible or invisble while you are working. Sometimes this is helpful as you are working on animations. The "lock" icon is used to temporarily freeze or lock layers you do not wish to accidentally change while you are working. It is handy to know how to undo an action when using Flash -- just in case you make a mistake. Pressing the Ctrl and Z keys at the same time will undo your most recent action. There also is an Undo option located on the Menu Bar (Edit > Undo). Continue to actually create the animated banner. |
 You
will also be using the Stroke Color and the Fill color Tools. These are used to change the color of
the object you are working with.
 The
area at the left side of the Timeline shows the frames in the
animation. This area is used to configure keyframes which indicate
where the animation changes. The Timeline can also be used to
automatically create tweens (more on this later). The transparent red
rectangle indicates the frame that is currently displayed on the Stage.